VS Code with OpenCV C++ on Windows 10 Explained
TL;DR
You can get the full example from here: https://github.com/Cuda-Chen/opencv-config-with-vscode
Introduction
OpenCV is a powerful tool in the area of image processing because of its speed and intuitive API. However, configuring OpenCV is a tough work especially on Windows.
In these days, I noticed a request about configuring OpenCV C++ with VS Code on PTT, which tackled my curiosity of how difficult it is to configure on Windows. After trying configuring for a morning and half of a afternoon, I finally completed the configuration and successfully compiling. For your ease of configuring of OpenCV on VS Code, I decided to write this post to teach you.
Configuration
This tutorial assumes you use the following configurations:
OS: Windows 10 64-bit
Compiler: Mingw-w64 (Specifically, x86_64-8.1.0-posix-seh-rt_v6-rev0)
Compiler binaries' path: C:\\mingw-w64\\x86_64-8.1.0-posix-seh-rt_v6-rev0\\mingw64\\bin
OpenCV version: 4.1.1
OpenCV binaries' path: C:\\opencv\\OpenCV-MinGW-Build-OpenCV-4.1.1-x64\\x64\\mingw\\bin
The \\ delimiters are added in purpose.
Configure Procedures
0. Install VS Code (Visual Studio Code) (Of course!)
1. Install VS Code C/C++ extensions (ms-vscode.cpptools)
Suggested by document of VS Code, you can install it by the following procedures:
- Open VS Code.
- Click the Extensions view icon on the Sidebar (or
Ctrl+Shift+Xkeyboard combination). - Search of C++. After searching, you should find the extensions
shown below:
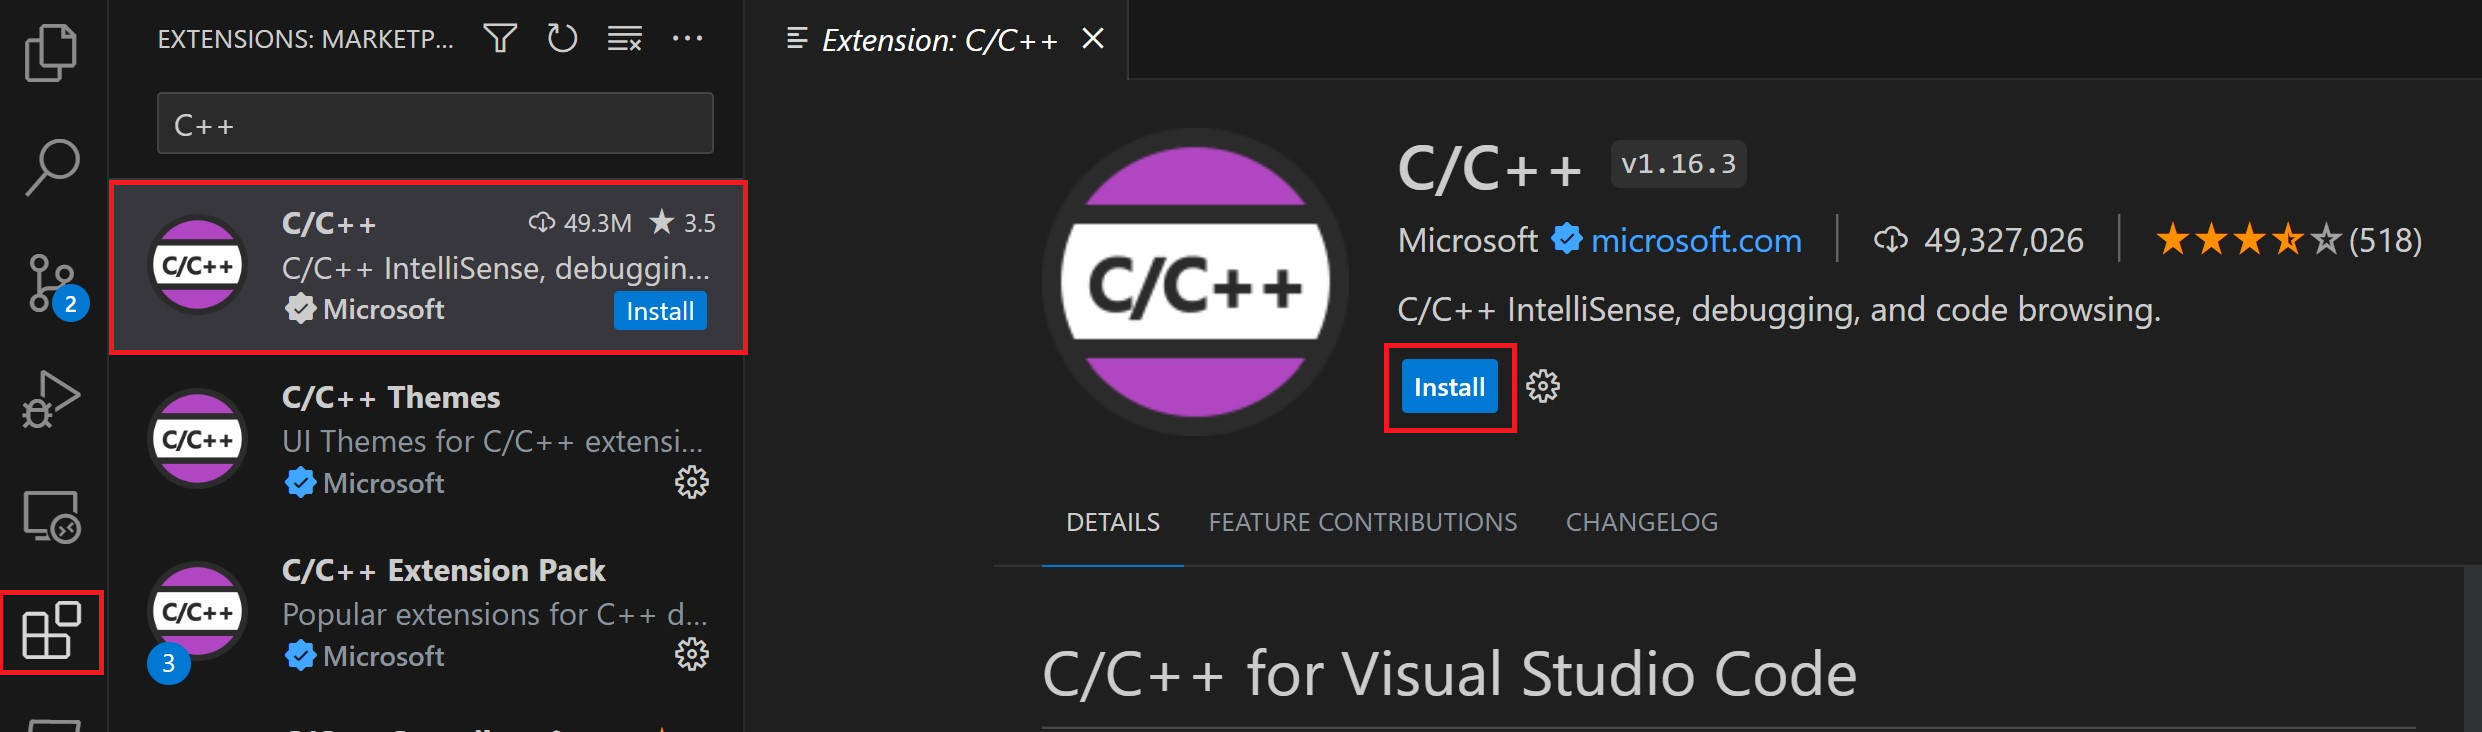
Then Click Install to install it.
2. Install C/C++ Compiler and Debugger
In this part I choose Mingw-w64. Notice you should choose the following
setting when installing:
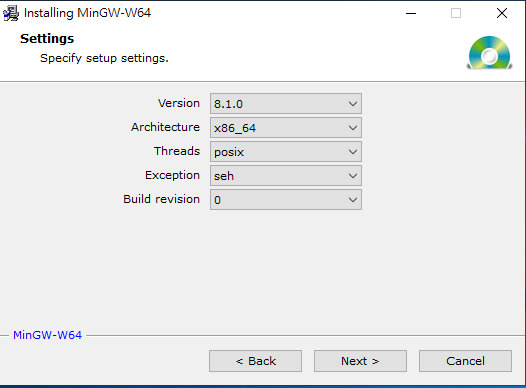
The reason of choosing these settings will be mentioned in the next part.
I assume you install all of the compiler stuffs in
C:\mingw-w64\x86_64-8.1.0-posix-seh-rt_v6-rev0
3. Download pre-built OpenCV package
Download pre-built OpenCV package from OpenCV-MinGW-Build.
Because we choose version 4.1.1, there are some specification of this build:
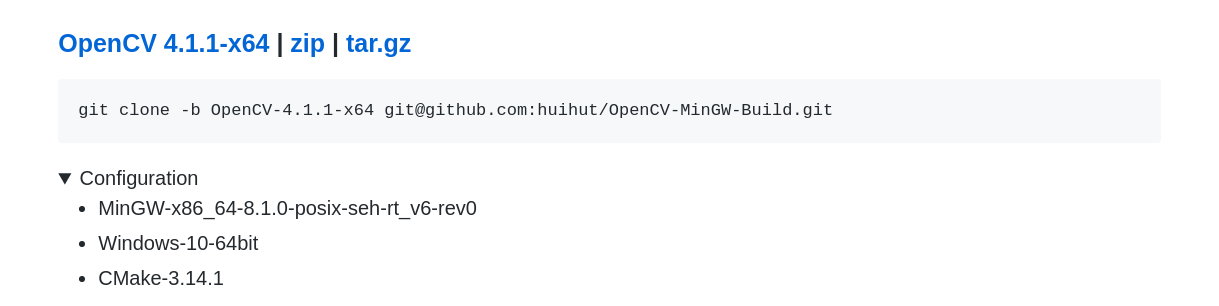 We can see the package is compiled with
 MinGW-x86_64-8.1.0-posix-seh-rt_v6-rev0.
As a result, you should set the configurations of MinGW as same as what
the package uses.
4. Add the Compiler Path and Pre-built OpenCV Packages to Path Variable
In order to let other programs find the name of compiler and OpenCV package
without entering the absolute path, you can set the Path variable of
your account with the binaries of compiler as well as OpenCV package.
Below is an example to show the setting of environment variables. Taken from superuser:
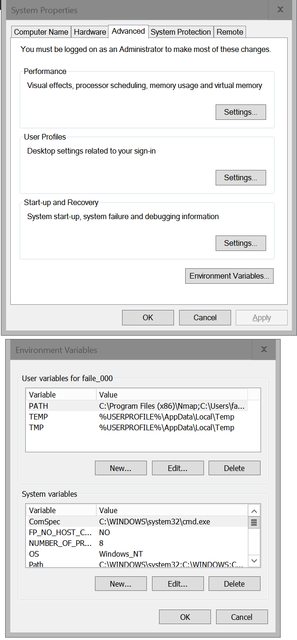
For editing the
Pathvariable, here are the processes:
- Go Control Panel > System > Advanced system settings.
- Then switch to “Advanced” tab in System > Properties window and click “Environment Variables” button.
- At last, edit the
Pathvariable of your account (add compiler and OpenCV binaries path).
I assume you install all of the OpenCV stuffs in
C:\opencv\OpenCV-MinGW-Build-OpenCV-4.1.1-x64
5. Configure the .vscode files of your project.
First, create a new project called opencvexample.
Then copy and paste the task.json, launch.json, and c_cpp_properties.json
I created from this repo.
Note: currently I cannot launch debug mode in VS Code. Need someone to help me.
May. 17, 2020 update: thanks Tinashe Tanyaradzwa Mabika pointed that there is a typo in launch.json file, and I have fixed the problem!.
I also make some brief explanations of each json file and some changes I’ve applied.
task.json
This file tells VS Code to invoke the compiler to create an executable file based
on the source code.
I have made some alterations of command and args:
"command": "C:\\mingw-w64\\x86_64-8.1.0-posix-seh-rt_v6-rev0\\mingw64\\bin\\g++.exe",
...
"args": [
                "-g",
                "${file}",
                "-o",
                "${fileDirname}\\${fileBasenameNoExtension}.exe",
                "-I","C:\\opencv\\OpenCV-MinGW-Build-OpenCV-4.1.1-x64\\include",
                "-L","C:\\opencv\\OpenCV-MinGW-Build-OpenCV-4.1.1-x64\\x64\\mingw\\bin",
                "-llibopencv_calib3d411",
                "-llibopencv_core411",
                "-llibopencv_dnn411",
                "-llibopencv_features2d411",
                "-llibopencv_flann411",
                "-llibopencv_highgui411",
                "-llibopencv_imgcodecs411",
                "-llibopencv_imgproc411",
                "-llibopencv_ml411",
                "-llibopencv_objdetect411",
                "-llibopencv_photo411",
                "-llibopencv_stitching411",
                "-llibopencv_video411",
                "-llibopencv_videoio411"
            ],
...
- The
commandwill invode the compiler. Here, I change the path to the MinGW compiler I desired. - The
argswill be passed to the compile command as compiler flags. You can see the program will link with OpenCV libraries. - As a thumb up rules, only include the libraries you are going to use, though I include all the libraries of OpenCV.
launch.json
The launch.json file will launch the GDB debugger when you start to debug the
program, and I change some lines shown below:
...
"program": "${fileDirname}\\${fileBasenameNoExtension}.exe",
...
"miDebuggerPath": "C:\\mingw-w64\\x86_64-8.1.0-posix-seh-rt_v6-rev0\\mingw64\\bin\\gdb.exe",
...
- The
programis the executable of this program. - The
miDebuggerPathfind the executable of debugger, and I alter to the GDB debugger I would like to use.
c_cpp_properties.json
The c_cpp_properties.json lets you have more control over the C/C++ extensions:
...
"includePath": [
                ...
                "C:\\opencv\\OpenCV-MinGW-Build-OpenCV-4.1.1-x64\\include"
            ],
...
"compilerPath": "C:\\mingw-w64\\x86_64-8.1.0-posix-seh-rt_v6-rev0\\mingw64\\bin\\gcc.exe",
...
- The
includePathsearch the path that will include the libraries you want, and I add the path of OpenCV. - The
compilerPathfinds the path of compiler, so I set to the compiler I am going to use.
6. Create Code, Compile It, and Run It
Create a file named main.cpp and paste the following:
#include <iostream>

#include <opencv2/opencv.hpp>

using namespace cv;

int main( int argc, char** argv )
{
    std::cout << "aa" << std::endl;

    std::string img = "lenna.jpg";
    Mat srcImage = imread(img);
    if (!srcImage.data) {
        return 1;
    }
    imshow("srcImage", srcImage);
    waitKey(0);
    return 0;
}
Then put a image called lenna.jpg from here.
After that, compile the project and run it, you should get a window with Lenna image if there is no problem.
2020.04.06 added:
For building and running the project, you can press Ctrl+Shift+B to build
and type the executable name to run in terminal. For more information, you
can check this official guide.
Conclusion
In this posrt, I teach how to set up VS Code with OpenCV C++ package from scratch. Though the debug part cannot work, I successfully compile and run the program compiled with OpenCV.
Current Problem
Currently, whenever I start to run debug mode, I always receive this message box:
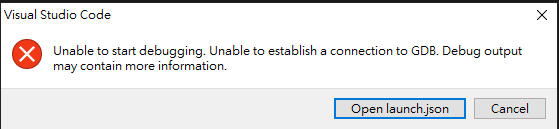
It would be glad if someone can leave a comment of e-mail me to solve this error :)
May. 17, 2020 update: thanks Tinashe Tanyaradzwa Mabika pointed that there is a typo in launch.json file, and I have fixed the problem!.
Reference
[1] https://code.visualstudio.com/docs/languages/cpp