Image segmentation with YOLOv3 and GrabCut
Motivation
YOLO is an amazing work of object detection with its high FPS, and the author has made a lot of alterations in the past few years, namely YOLOv2 and YOLOv3.
As a matter of fact, GrabCut[1] is an interesting algorithm that it does image segmentation by using a rectangle provided by user. As shown in the paper, GrabCut gives us a tempting result of image segmentation.
Summing up, object detection uses bounding box to indicate user the location of an object, while GrabCut applies a rectangle, or bounding box, to do image segmentation. When I was working on my diploma thesis, I suddenly came such thought to mind that if it is possible to combine these two things seemed irrelavent together so that we can create an image segmentation system with high speed and tempting result. Therefore, I made this side project and wrote the result and thoughts of it in this post. Also, I show how to apply such image segmentation system on custom dataset.
What’s GrabCut
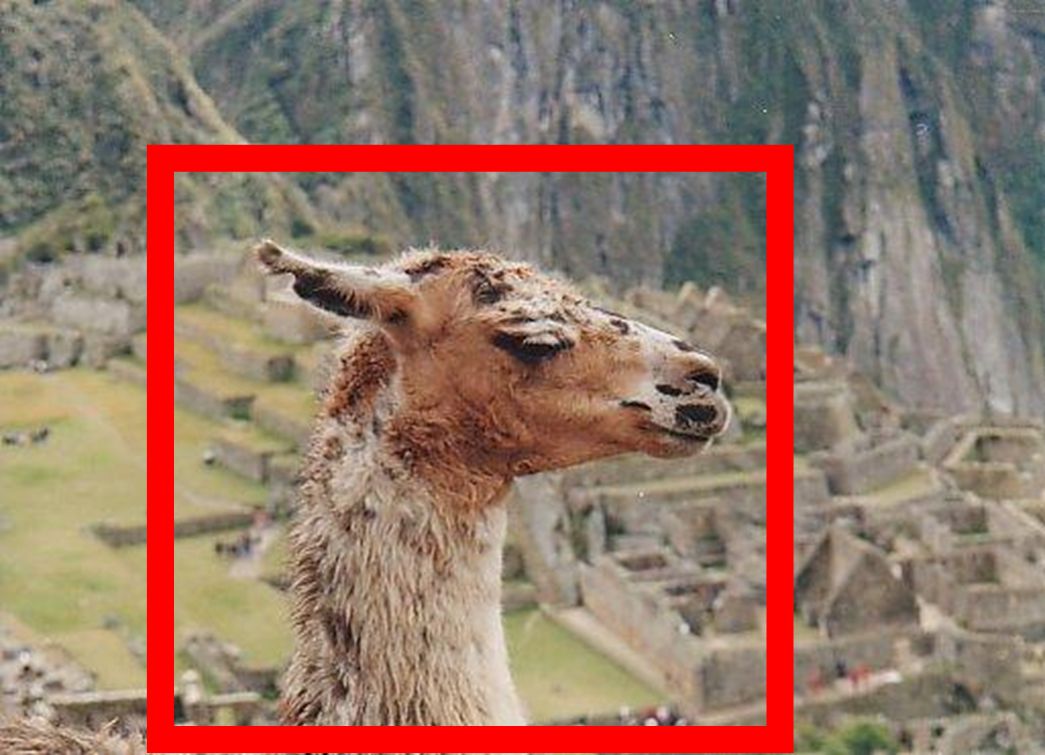
GrabCut is an interactive foreground extraction that segments the desired object by providing a rectangle. You draw a rectangle around the foreground area (make sure your foreground are in side the rectangle entirely!). Next, the algorithm tries to segment the object by applying certain iteration. For more information, you can read this post in official OpenCV tutorial.
Prepare
- Clone this repo.
- Download the pretrained weights from my Google Drive and put it to
yolo-fishdirectory. - Create
condavirtual environment and install the dependencies:$ conda create -n fish-yolo-grabcut python=3.6 pip $ conda activate fish-yolo-grabcut $ pip install -r requirements.txt - Activate the virtual environment.
- Run a demonstration with this command:
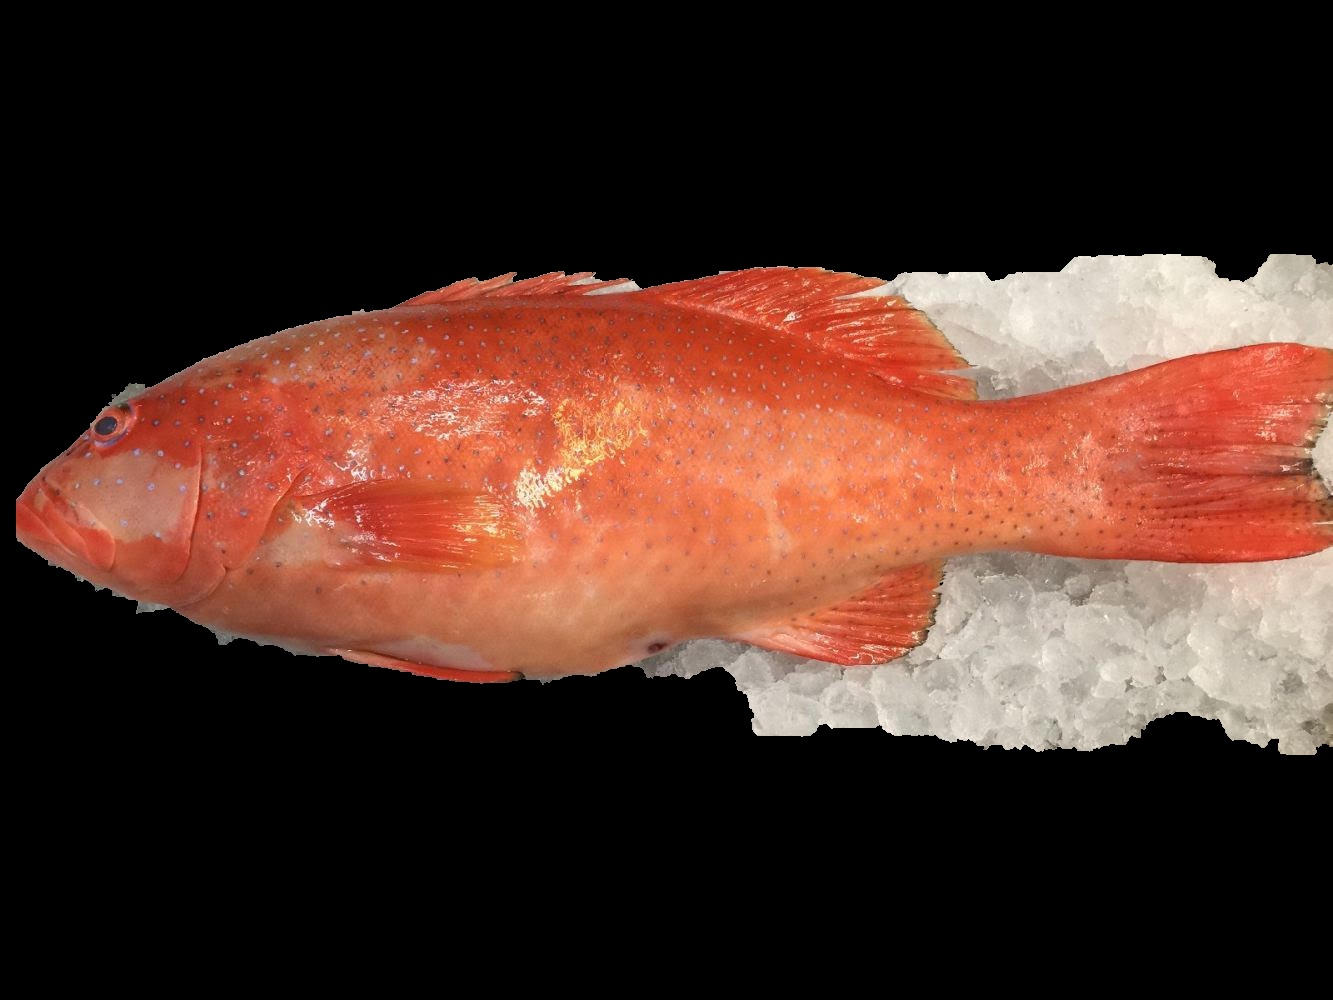
$ python main.py --image ./images/七星斑.jpg --yolo yolo-fish
You will find a picture named grabcut0.jpg in fish-yolo-grabcut root directory
which should look like this:
Explainations
You will like to realize how such magic happens, so I am going to explain how I let this magic happens in this section.
For YOLOv3 object detection section, you can see here because it is pretty wordy :)
For GrabCut part, here are the code to make such miracles:
cv.grabCut(img, mask, rect, bgdModel, fgdModel, iterCount[, mode])[2] This function applies GrabCut to your image with a rectangle, and we are going to see some parameters closely:
(1)img: Input 8-bit 3-channel image, usually colored images.
(2)mask: Input/output 8-bit single-channel mask. Here I set to the same width and height ofimg
(3)rect: ROI (Region Of Interest) which contains a segmented object. The pixels outside the rectangle, or ROI, are considered as “sure background”.
(4)bgdModel: Temporary array for the background model.
(5)fgdModel: Temporary array for the foreground model.
(6)iterCount: Number of iterations the algorithm must make before the function returns the result. Here I set to 5.
(7)mode: Operation mode. I set tocv.GC_INIT_WITH_RECTbecause I will use the bounding box generated by YOLOv3 to apply GrabCut.
Summing these up, you can now realize the meaning of the code written in
GrabCut.py:
image = _image.copy()
mask = np.zeros(_image.shape[:2], np.uint8)
bgdModel = np.zeros((1, 65), np.float64)
fgbModel = np.zeros((1, 65), np.float64)
# extract the bounding box coordinates
rect = (boxes[i][0], boxes[i][1], boxes[i][2], boxes[i][3])
print(rect)

# apply GrabCut
cv.grabCut(image, mask, rect, bgdModel, fgbModel, 5, cv.GC_INIT_WITH_RECT)
Note that I use deepcopy of input image because there may be more than one detection and I don’t want to overwrite the input image (will explain in the following point).
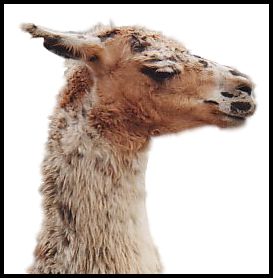
- postprocessing
After applying GrabCut, the function will return modified
mask,bgdModel, andfgdModel. We can get the segmented result by these code:
mask2 = np.where((mask == 2) | (mask == 0), 0, 1).astype('uint8')
image = image * mask2[:, :, np.newaxis]

imgs.append(image)
You can see I modify image here (line 23); as a consequence, I make a deepcopy in the
above point.
In addition, I append image to list imgs because there may be more than one
detection.
Conclusion and Thoughts
In this post, I make an example of how to combine YOLOv3 and GrabCut to create a image segmentation system, and I show the result on my custom dataset. Also, I explain how to use OpenCV GrabCut function and some points you have to be careful when apply GrabCut.
As the thoughts, I found the result is not as tempting as the results shown in GrabCut paper, but I think I can improve this by re-training YOLOv3 so that it will make more precise detection to imporve the result of GrabCut.
Reference
[1] https://cvg.ethz.ch/teaching/cvl/2012/grabcut-siggraph04.pdf
[2] https://docs.opencv.org/master/d7/d1b/group__imgproc__misc.html#ga909c1dda50efcbeaa3ce126be862b37f