Show Off Your Machine Learning Project on Web Part 1: Streamlit It!
TL;DR You can get the example project here.
Motivation
As time passes, you have done a lot of machine learning projects, but you need a visualization or other guys won’t know the procedure and result of your project. What’s worse, some people think that you are not prepared because you cannot use Docker and PaaS deployment (many of the machine learning jobs in Taiwan need frontend or backend skills).
Therefore, I write this series to not only create a web-based app, but also show basic Docker usage and deploy my app onto Heroku with Docker.
Goal of This Series
This series will guide you to:
- Use a framework to let your machine learning project run in web.
- Use a Docker to ease the difficulty of environment setting and integrate with DevOps workflow.
- Use a PaaS deployment to show off that you can deploy your project.
Goal of This Part
For this part, I will show how to create an app with streamlit. Besides, I will show how to combine your OpenCV project with streamlit with no problem.
Why Choose Streamlit?
The reason I choose streamlit rather than flask and django is for its fast prototyping and ease to setup and deploy. Most of all, you don’t need to learn some knowledge such as routing and MVC structure so that you are able to build an app.
Hey, Show Me the Example!
In this series, I use my fish-yolo-grabcut as a basis of streamlit app.
The content of this streamlit app, named app.py, is shown below:
#!/usr/bin/python

import cv2 as cv
from utils import yolo, GrabCut
import numpy as np
import streamlit as st


def run():
    yolopath = "./yolo-fish"
    confidence = 0.25
    threshold = 0.45

    st.title("fish YOLO + GrabCut demo")

    uploaded_img = st.file_uploader("Choose an image...", type=['png', 'jpg', 'bmp', 'jpeg'])
    if uploaded_img is not None:
        file_bytes = np.asarray(bytearray(uploaded_img.read()), dtype=np.uint8)
        image = cv.imdecode(file_bytes, 1)

        st.write("This is your uploaded image:")
        st.image(image, caption='Uploaded Image', channels="BGR", use_column_width=True)

        boxes, idxs = yolo.runYOLOBoundingBoxes_streamlit(image, yolopath, confidence, threshold)
        result_images = GrabCut.runGrabCut(image, boxes, idxs)

        st.write("")
        st.write("finish grabcut")
        st.write(f"There are {len(result_images)} segmented fish image. Each listed as below:")
        for i in range(len(result_images)):
            #cv.imwrite(f'grabcut{i}.jpg', result_images[i])
            st.image(result_images[i], channels="BGR", use_column_width=True)

if __name__ == '__main__':
    run()
Breaking Down
As you may be fresh to streamlit, here are some points to let you know what will this app looks like:
st.title()shows the title of your streamlit app.st.file_uploader()lets user upload the file they want. In this case, the user would like to upload an image.st.write()shows the text you want in browser.st.image()shonw the image in browser.
How Streamlit Works with OpenCV
st.file_uploader() will return an BytesIO object.
However, cv.imread() only accepts string to read an image.
As shown in this issue, you
can use cv.imdecode() instead to convert the file to an OpenCV image, or numpy array.
Of course, don’t forget to use BGR color format when showing your image using
st.image()!
Run the App
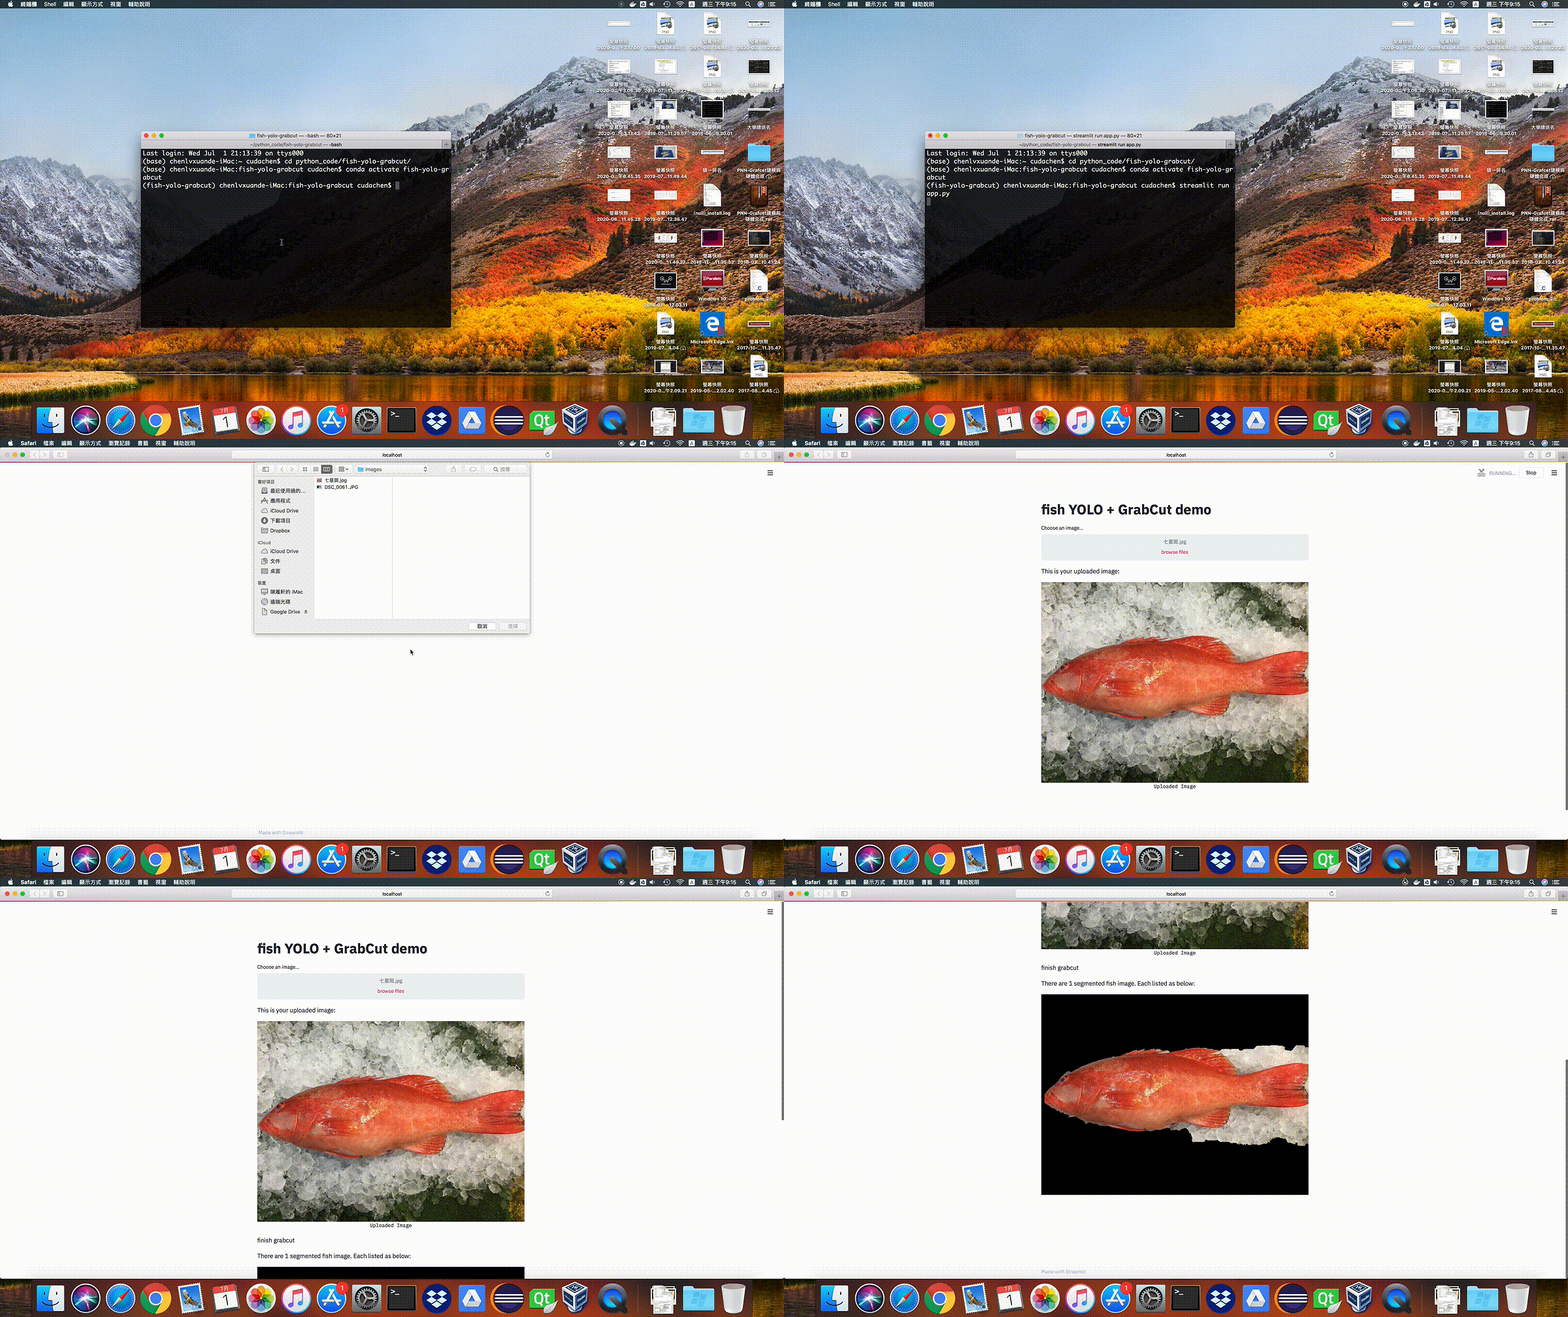
Just type streamlit run app.py, then streamlit will set up the server and open the browser
automatically.
Demo

Wraping Up
In this part, I make an introduction of stream, and show an example app with my existing project. I also tell you what will my app look like and give a solution when using streamlit with OpenCV.